

 I almost painted it black then white, distressed it and added a few large black numbers 1, 2, 3, and 4. I even considered making a piece to attach to the back, like a mirror attaches to a dresser. I was going to make it out of paint sticks and chicken wire. I have been seeing a lot of things done in this fashion all over the blogs. Painted numbers is all the rage.
 Why didn't I do that?? Something happened yesterday morning. I read a post by Deneen at Dreaming in Color called Bird Wall Art. She made this completely cool bird sconce knowing that it was different and risking that it might not be received well around the blogs. I absolutely love her sconce and her tenacity inspired me to stick with what suits me. I decided not to make it something that I thought might fit in better out in blog-land. The farmhouse white with black numbers are charming, but my personal vision for this jewelry box was different. If Deneen could do that, why not me?! Right?! So with my personal preferences intact, I set out to give this little jewelry box a face lift. Ultimately, my new jewelry box isn't as super cool as her sconce, but hey, it's something.
I decided to use some of my favorite papers and got right to work. First, I filled in a trench between the two knobs on each drawer with my MinWax Wood Filler. The trenches were there to create the allusion of four drawers. There are two drawers. I need these to be filled in for the paper to lay flush with the surface of the drawers.
 |
| Yep...this is the top of my washing machine! I was so impatient to get started, I didn't set up a work space conducive to pretty blog images. |
 I removed the little wooden button knobs, which wasn't easy. Those little knobs were hanging on for life! Once I got them off, I found exposed pointy screw ends that couldn't be removed. I knew that whatever replaced these wooden balls would have to accommodate that spike. I then measured and precision cut the pieces for the top, sides and fronts of drawers. I used Modge Podge and my smoothing tool to press the paper down firmly making sure the edges were tightly secured.
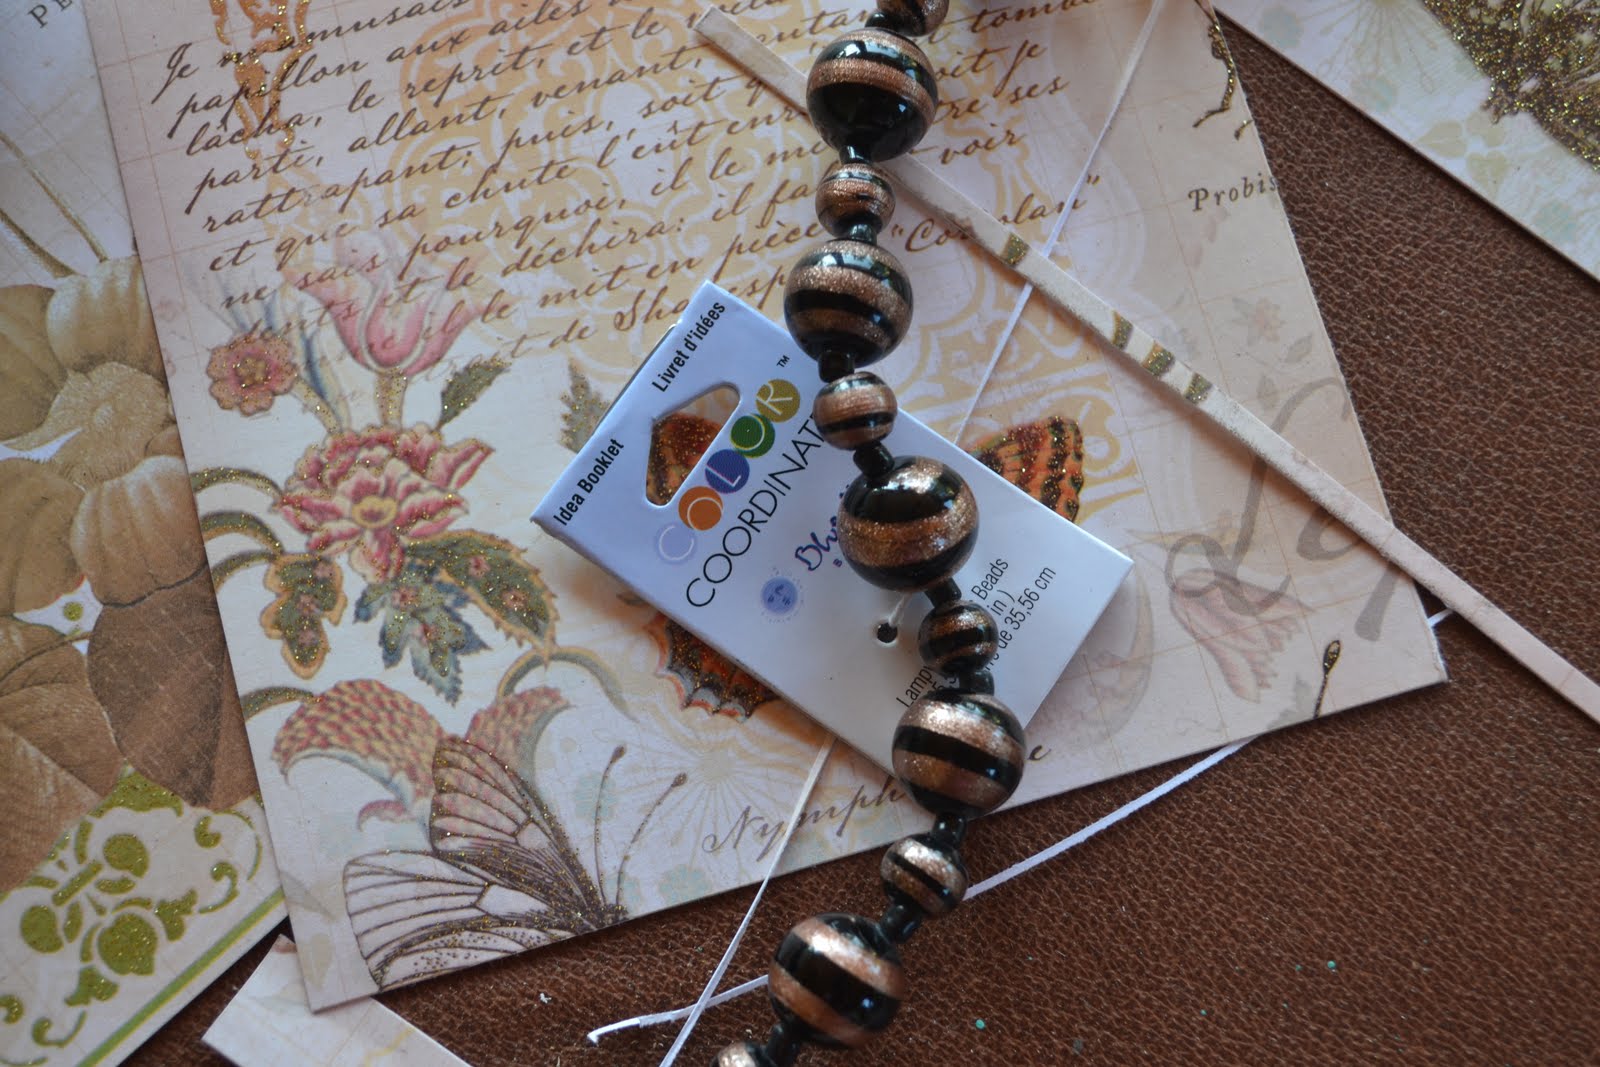
I stopped everything to pick up kids at school, but first ran into my local AC Moore and picked up this string of beads matching them up to the paper. I wanted to make new knobs with these but knew that the screw head on the drawer was not going to get covered. I thought about my daughter's beading supplies and hope that she would have something that would work.
When we returned home, I got her beads out and examined her inventory. I found a few of those crafty beads that all the kids use at camps to create simple bracelets and such. Perfect! They would work wonderfully and appear as shaft-like pieces for my new knobs. I tried Aleen's Craft Glue first, but didn't get a good enough bond.....so out came the glue gun. I might still remove them and use Gorilla Glue at another time. This will do for now.

I then added the specialty beads to those beads to form the pull and covered the bead hole with a tiny amber crystal. I love how they draw the details from the papers and add a little glitz with the metallic gold swirls.

Now for the final results....

 |
| Top |

 |
| -Before- |
 |
| -After- |
-The End-
This Post was FEATURED! at

I'm Linking this post to:


This Post was FEATURED! at
I'm Linking this post to:
16 comments:
Wow Lesley! This looks fantastic! What a difference! I have to say for the first time since I started this blog a tear came to my eyes! Your words truly mean so much to me! I hope to inspire others but to read it in print really made me so happy!! Thanks for your kindness! You'll never know how much that means to me! So glad you're in my circle of friends!
Found your sweet blog today through Deneen's blog and wanted to say hi! I love the transformation of the jewellry box, so much nicer now, well done you :)
Bee happy x
Have a delicious day!
I can't imagine why blogland wouldn't LOVE this makeover. That paper is so sweet and I never would have known you had to troubleshoot to make those pulls. Gorgeous. (I'm here from Dreaming in Colour)
WOW! That looks fantastic! What a beautiful transformation!
Great work!
Linda
It turned out really beautiful. Love that print and the touch of the beads. Thanks for linking this post to Share the Love Wednesday!
Mary
pretty....love the subtle colors...and the butterflies:)
Great makeover - lovely paper!
Liz
really like that, sista
How cute! Looks so fresh and summery now.
Turned out perfect!
Lovely! I have a box very similar to yours; I love the nature scene and soft colors you chose.
This is beautiful. I will be featuring this tonight at my Swing into Spring party. The party opens tonight at 8pm EST. Please stop by and pick up an I've Been Featured button. Thanks so much.
So nicely done! I have a jewelry box that I got on the cheap a few years ago that needs a revamping....this might be just the thing! Thank you for sharing ;)
MJ @ MD School Mrs
Great job on the jewelry box face lift! Thank you for linking up to Sew Woodsy last week. We hope you'll come back today and link up another craft project!
Just found your blog and I am reading some posts. Number 1, lovely transformation of something very sketchy to something very lovely. Number 2, I hope that most people create what they love, irregardless of what they see on other people's blogs. I feel some people copy, perhaps because they need more support creatively, and that is just fine. But, if you have your own ideas, than, do what pleases YOU and who knows who you might inspire! I too have an ugly little chest, painted with fruits that totally needs a make over. Now that school is over, I hope to get on the creative bandwagon.
I love all the designs on these cabinets.
lisa
Post a Comment