Showing posts with label Gardening. Show all posts

Wednesday, July 18, 2012

How To Root Coleus. It's Easy. (and a Feature!)


Summer is here and many of us are using Coleus in our gardens and planted containers around our patios and porches.  I love Coleus because they are so hardy and thrive in the heat of the summer and the beating down of the sun's rays.  They are also filled with all sorts of varieties and colors too.  I think they add a little personality to any setting.  Better yet, they are pretty cheap.  Even better yet, they are the easiest plant to root.  I buy a few plants and multiply them through the season by taking cuttings as they grow or get a little 'leggy.'  Plus...as if I needed another great reason...they are a delight to have on my kitchen window sill as they root in cut little glass containers.

So here are the steps:

1.  Take a clipping from the top of your coleus.

2. Clear away the bottom of the stem of leafs.  I do this to cut down on rot in the water.  You only need the stem to get roots.  Extra leaves just get in the way.

3.  Find a cut clear container, vase or whatever.  I like clear so I can monitor the root growth as it comes through.  Fun to watch the miracle unfold.  Fill the container with fresh water that covers the bottom of the stem.


4.  Wait a few days to a week and the roots will start to show. 

5.  Wait until the plant has a healthy amount of roots and plant it in a pot with wet soil.  


6.  Make sure you give it a little water everyday for about a week to help it establish itself in the pot.  Done. New plant!  

This particular new coleus found a home on the table on my back screened in patio next to a few succulents. I also rooted that succulent there in the front middle.  How did I do that?  Well, it was a little baby or offshoot of a large succulent.  I just plucked it off and set it in this pot. Watered it daily and now look at it!


So simple.  I learned how to do this by trial and error.  I clip almost anything in my garden and try and root it this way.  Have you ever done this? You should!  Get clipping!

********Before I leave today,  I wanted to say THANK YOU to Kim over Savvy Southern Style for the nice feature of my White Living Room.  I have been posting links to my blog on her Wow Us Wednesday for over and year and this is my first feature!  Click HERE to see the feature.  Thanks Kim!


Click HERE to see the Original Blog Post about this Living Room

Tuesday, July 3, 2012

How To Give A Garden Element A Fresh Look: Froggy Gets a Much Needed Face Lift and the Water Garden Finds A New Place

If you have been following me for over a year, you know that I have a three tiered fountain that I converted into a planter with a water garden in the bottom tier.  I blogged about it in my post Are You Spittin'? in April of 2011.  I wanted a small water garden and no longer liked the splashing of all the water from the three tier at my front door!  Can you say "showering" my guests?!

So here it was at my former home at the front door.
Planter/Water garden at former home.


I moved this fountain on my own before the movers came because I have worked years on establishing the water plants in this mini-wonderland.  I wasn't about to let just anymore move it.  I even rented a truck to help me.

At first I put it near my front entrance, but moved it once again about a week ago to a location on the back of my property near where I walk my dogs.  I have placed a little table and chairs here as well.  Nice place for an afternoon beverage.

The little spitting frog that helps keep the water circulating in the water garden had gotten kinda, well, trashed.  So yesterday, I unplugged him and took him into my studio for a quick renovation.  Here is what he looked like.
Before Renovation

I decided to use craft paints to bring him back to life.  I also wanted to bring the bamboo back to life.  Without a little paint to protect it, I am sure it was well on it's way to rotting.  I just kinda went to town with several shades of green, brown and blonde.
Started with a base color and added color building textures. Added a little bamboo look as well.

Finished him off with a little gold to bring back the vertiginous look.


Here is the Before and After side by side for comparison.  Big difference and it took just a few minutes! I could have gotten all annoyed by the lack of detail on the lily pad.  But I just let it go knowing that it wouldn't really matter.  We have to remember to do that sometimes. Working something too hard at time just kills the fun.


I bought him a new pump to give him an even fresher look, and quickly placed him back in his world.  Here is is spitting away!!


Look at him down there spittin' away!  He got his ribbet back baby and is lovin' it. Don't be hating on my for that black cord showing.  I ran out of steam and have to go back and hide it under the white rocks. Saving that for a cool afternoon. The Heat! Phew! It's hot out there people!

Do you have something in your garden that the weather has taken it's toll on?  It is amazing what a little craft paint can do to spruce up even the most worn elements. I don't know about you, but I think garden accents cost a pretty penny!  Might as well get my money's worth for yet another season!

-The End-


Monday, June 27, 2011

Gettin' Diggy in The Tropics

Oh the Heat!  South Florida during the summertime can be a heat locker of unrelenting hot air.  I usually need to move my plants around in different parts of my yard because of the changing direction of the burning rays of the sun when the season changes.  Most people think that we do not have seasonal changes.  But anyone who is into gardening and landscape will tell you that there are definite changes.  If you are not attune to such things, gardening in a tropical climate will be frustrating. 

My hubby and I call gardening and landscaping, "Gettin' Diggy in the Yard."  It's a fun catch phrase because true gardening requires digging, not just buying plants in pots and placing them around.   If you aren't digging....you aren't gardening.  You might be digging a hole to plant something, or digging something out.  It's a gettin' diggy thing......

Just like other areas of the country, we plant annuals and perennials.  The difference is when those in the northern states are planting their Impatiens, our Impatiens are done, leggy and ready to be removed.  Our seasons are kinda reverse.  The heat of the summer can be like the freezing temps of the winter for the north....inhospitable for many plants.   

 I have this large pot that sits to the left of my front door.  I change out what is in the pot about 4 times a year.  As you can see....the pot is not happy. (image left) I didn't water it for a day and this is what I got.  Yep.  The plants in the pot are root bound and without more soil around the plants, the water runs through with no where to cling for supplying water at a later time to the plant.  I could struggle with this and make sure to water everyday, but why?  It won't cost much to replace and it's only getting hotter.  No need to frustrate myself.  This is suppose to be fun!  You gotta know when to fold 'em. Right?!

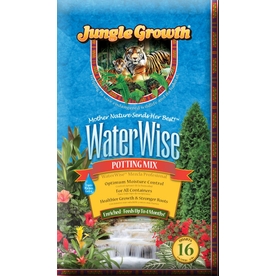
During the summer months, I usually pare down in my gardens and replace some pots with more drought tolerant annuals, like Purslane.  After the Purslane is established, it almost likes being ignored.  With a 12 day vacation looming in August, I don't need the added stress of wondering if my plants survived my absence.  So I stopped off at Lowes and bought a hanging pot of Purslane that was on sale for $4.99 along with a 10 quart bag of Jungle Growth Water Wise potting soil.  Whenever I add or replace plants in a pot, I make sure and add fresh potting soil. The soil stay moist longer. 

So this image to the right is what the pot looked like yesterday after planting the Purslane.  Not that great, but I knew it would take a few days to spring into action. I left the Liriope in the pot because it was in great condition and is drought tolerant because it is a grass plant.  The plants that I removed had been covering it for a few months.  It was nice to see it back out enjoying the sunlight and creating a little visual texture in the pot.

Then today, I walked out front and saw this.....


Already an improvement.  Don't you think? 

Just to the right of this area, are my friends the Florida Kitsch Flamingo couple, Fred and Flo.  My sweet potato ground cover is coming alive, as well as, the succulent that I crammed down in there about 2 months ago. I do that a lot of times.....put half dead plants into the ground where I think they might come back.  I love it when it works!  This sweet potato vine loves when it rains. We had a few afternoon showers and it is going crazy. 

This week is a busy one for me.  My two teenagers are in two different summer programs in two separate areas of the county.  I will be doing a ton of driving.  I am going to bring you short 'snippets' this week because my time is going to be limited.  Hope you don't mind.  I will try and keep it interesting.  Enjoy the day!  Go out and get diggy in your gardens.  For most of you, it's a great time of the year to enjoy it!

-The End-

Wednesday, June 15, 2011

Follow Up Report on My Terrariums and Features for My Jewelry Box and Hall Tree Projects


I wanted to do a quick follow up with you guys about the results from my terrarium project that I showcased last month on my post entitled Cool Terrariums for Only Cool People.  It has been almost a month since I put them together and I have some findings to share. 

I noticed that the ones that were in the latched down lids did not fair as well as the others.  The moss has died and the spider babies have faded. There is also a stinky-ness on the inside of these jars. The others, however, have flourished! (You can see one in the background of the image to the right.) They are all in the same location and have received the same care, I am surmising that the latches on these jars are just too tight for a terrarium to do well.  Must have something to do with the serious lack of air exchanged. 

I have given one away (the little one out front in the first image) to my good friend artist Riitta Klint, when I visited her studio last week.  That one was doing wonderful too.  It has a pop down lid with one of those plastic flanges.  I just thought I would share, because when I put information out there, I want it to be correct!  So amend my comments to say that latch lidded jars don't work very well for terrariums! 

On another subject, many of you will remember just a little over a week ago when I posted my Hall Tree Revealed: It's All Over But The Waxing.  After posting the reveal, I linked it up at a few blog parties and got some really nice comments from people.  I also got a super duper nice FEATURE! Yeah! from SJ at Homemaker on a Dime.  Thanks, SJ!

You can click on the button below if you would like to see the Hall Tree featured.  You will also see a super cute monkey sandwich that she also featured.  I have been into monkeys and owls lately....don't know what it is.....

Another fun thing just happened last night.....Judy at DIY by Design featured my Jewelry Box Face Lift on her Spring Into Spring Party!  If you want to see the feature, click on the button below. Thanks, Judy!

Not much more to report today.  The laundry is piling up and the food is dwindling in my refrigerator. We are in full blown lazy days of summer around here.  But, that is how it goes in the home of a crazy, creative type....I guess.  The daily duties just get tabled for the fun stuff!  Enjoy the day!

-The End-

Saturday, May 21, 2011

ET, The Extra-Terrestrial?? Nah, Just a TT As In Terrarium Tutorial.

I promised earlier this week in my post Cool Terrariums, For Only Cool People, that I would write a quick tutorial about my terrariums.  Since it is Saturday morning, I knew you might have a little time during your weekend to fit this little project in!

Make a terrarium is pretty darn easy.  You need a few supplies, with one very key ingredient. 

Glass, lidded jar
Assorted Stones and Whatnot
New Potting Soil
Activated Charcoal (key ingredient)
Moss (can be the bagged Spanish)
Assorted mini plants sold in the indoor plant area
Small spade, trimmers.
Optional chopsticks to help place stuff down narrow necked jars

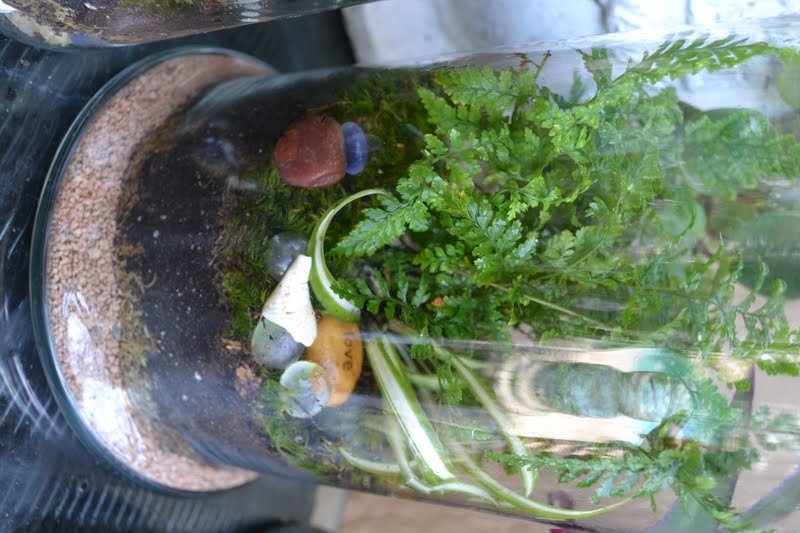
Take a handful of assorted stones, shells, marbles.....whatever you have laying around. I have a tendency to pick up a lot of bags of this stuff when on clearance at my favorite stores, like Pier One.  I put them away until something like this project begs me to bring them out. I also collect stones, rocks and shells whenever I am visiting nature on vacations or outings.  Place a few handfuls in the bottom of the jar.  If there is ever an over watering issue, the rocks will help with drainage.  This is key to not killing your plants! 

This will help with drainage which is a key to growing a successful terrarium. 

Over the rocks place some old, dried moss. This layer keeps the soon to be added dirt from leaking down into the rocky area.  I also like the visual layer that it creates.  Then add a layer of activated charcoal.  Activated charcoal is the 'secret ingredient' that makes this project work.  It helps keep odors away.  
Moss over the rock bed.
Put a good layer of soil into the jar.  It should be deep enough so that your plant bases can be buried completely.  Start to work the plants into each jar, trimming off long pieces.  I really work them around a few times before settling on a layout in each jar.  It's kinda like my paintings....something I have to re-work them to get them they way I want them.  Make sure that the soil is packed down tightly around each plant.  In the image below, you can see my pot of spider babies that I harvested and highlighted on my blog post, The Happy Accident Hospital and Rescuing Babies. Don't forget to look around your own garden and fields around your house for interesting specimens to try.

Fern, Moss, spider plants.
This process is messy, so I am hoping you have set yourself up in a good location for clean up!
 

After getting the plants in their proper places,  add little accent stones, shells,sea glass, mancala beads, marbles.  Whatever you got laying around will look cute. I have seen people use little miniature people and animals in their decor.  Put your own twist on the project!

Water the plants down by spraying them with water. I prefer to spray them heavily instead of pouring water because I can add more.  It is difficult to get the water out, once you have put it in the terrarium.  Here are a few images of the terrariums that I completed this week.


I hope these simple instructions help inspire you to create your own terrariums.  I will be giving these as gift throughout the summer, so they will be resting here in the shade under my care until then.  I am also working on a few gift tag accents that I think are pretty darn sweet! Get planting.

-The End-

Monday, May 16, 2011

Cool Terrariums, For Only Cool People

This super fun terrarium project is something that I have been wanting  to do.  I have been collecting lidded jars in the past month from yard sales and charity re-sale stores. I collected up small plants from my local mom and pop plant nursery, as well as, some spider babies that I talked about in my post, Making a Peaceful Place Just for One.  I also purchased some fresh potting soil and a bag of activated charcoal.  Then collected all sorts of stones, broken sea shells, mancala beads and marbles.

Back in the 70s, when I was a little girl, my cool neighbors on the street, the Donaldsons, use to make these terrariums.  Did you have those cool neighbors?....you know, the ones that were just so much more,..... cool?  Still wondering if they were really all that cool, but hey, they were good at selling the concept. I know it drove my mother crazy that we thought they were better than us.  Oh well, watcha gonna do?   The best part is that I learned to give up on being cool a long time ago.  Not wasting my time trying to be anything more than what I already am!  Me.

I will post a tutorial of how I did this later in the week. I want to pick up some supplies for finishing touches.  For now, I am just going to share you will a few images.......
These will rest here in the shade.  I am planning on giving them away as
gifts this summer but want to wait to make sure they establish themselves.
 
I use a gravel called "Turface" in the bottom
of this large pot.  Experimenting with
materials.

 
I tossed stones throughout each
landscape.  Some of the stones
are imprinted with words.
This one says: Create.


I like how the stones in the bottom
are peeking out here.
 
....because, Ya just gotta laugh!
Hope you liked the little sneak peek.  I hope to post a tutorial later in the week.  I will include a complete list of supplies to make these fun little terrariums yourself.  DISCLAIMER!  You cannot make these unless you are a super cool person.  Not cool?  Oh well......then it is just not going to be your thing.  What can I say?!!

-The End-