Pages

Friday, August 24, 2012

The Start to a Cozy Guest Bedroom and Throwing the Towel in on Making Money in the Blog World

These walls are not yellow!  See next image. More accurate.


Just wanted to check in to let you know that things are much better (for now!) around here.  Getting my teens back into school this week has given me a little time to myself.  I have slowed it down a bit around here.  I've also been trying to feed our souls, like making a nice snack in the afternoon for them and still getting the mani/pedi that I so desperately needed to do for myself! That darn hot towel on my legs was to die for!


Okay, slightly blurry and  that lamp cord needs
 to be hidden...but I really don't care.
Spending more time on things I care about! 
In between I have been slowly working on a guest bedroom.  I found a beautiful Ralph Lauren bed ensemble of which I am totally smitten.  I placed the bed off-center from the room and I kinda like the juxtaposition that it creates.  I am using my Pineapple Table as a side table. I picked up that cool mango wood lamp with a burlap lamp shade at a consignment shop that I ducked into yesterday.  Set it up on some of my favorite country style decorating books adding a little ice blue vintage ash tray as a table coaster.  Simple.  (click the highlight Pineapple Table to see that project from last year. Pretty cool)

Love this antique iron bed I picked up
in Atlanta about 12 years ago.
For those of you who have faithfully followed The Homeless Finch, I have an update. I have decided to just blog post when I feel like it.  I will probably not be as consistent as I have in the past.  I am okay with that.  I got all caught up in the "you have to stay consistent to build your blog" mantra.  I thought that I could actually build my blog to a level of making money.  But the truth is that few blogs make enough money to justify the time it takes away from other areas of our lives.  You might hear from me twice in one week, but then not again for a month. Hope you are okay with that.  If not, oh well you are out of luck!

Gonna head out today to haunt a few of my favorite antique and collectible shops.  Taking it slow.  Sometimes, slowing it down is the best recipe for a happier me.  See ya soon!

What's a room without an owl?!!
Thanks to my sis for this little dude!

-The End-

Wednesday, August 8, 2012

Nature's Promise of a Brighter Day


Woke up this morning to the first bloom on an orchid that I moved from our previous house.  What a beauty.    Is this nature promising me that there is always a chance for renewal?  I think it is...

True confessions...I have been really having a hard time keeping up with my blog lately.  Life outside my blog life as been such a tough up hill battle.  Motherhood has turned out to be tougher than I ever imagined.   There are days that are so hard to face, so hard to keep one foot in front of the other, that the idea of writing about art and home seem so unimportant.  For the past year, I have used The Homeless Finch as my refuge from the daily struggles with one of my kids.  Now, I have reached a point when I can't write about a sofa, a pillow or a painting.  My mind is just too cluttered with sadness.  But don't worry about me, I haven't given up hope.  Nature helps me remember that there is always hope...there is always a chance for brighter days...and there will be.

Just hang in there with me.  I might not blog as much as I have in the past.  I'm okay with that and I hope you are too.


To every thing there is a season,
and a time to every purpose under the heaven:
a time to be born, and a time to die;
a time to plant, and a time to pluck up that which is planted;
a time to kill, and a time to heal;
a time to break down, and a time to build up;
a time to weep, and a time to laugh;
a time to mourn, and a time to dance;
a time to cast away stones, and a time to gather stones together;
a time to embrace, and a time to refrain from embracing;
a time to get, and a time to lose;
a time to keep, and a time to cast away;
a time to rend, and a time to sew;
a time to keep silence, and a time to speak;
a time to love, and a time to hate;
a time of war, and a time of peace.


-Until Next Time-

Saturday, July 28, 2012

Little Worn Out Cabinet Becoming A Cute Little Unit to House Sound Equipment Has Me Singing

We have a little room off our pool we call the Cabana.  It's not really a cabana because it doesn't have running water, unless you count the hose off the side of the outside.  No sink, no bathroom, nothing.  It's kinda just a little 15 X 15 place to rest and enjoy the lake views and chill.  My hubby wanted to put a small sound system out in the space, so that we could enjoy some music while relaxing with a cool beverage.  The problem is that we keep this room wide open at all times and putting sound equipment in this space unprotected was just plain stupid.

We devised a plan to find a little cabinet that we could use to house the equipment.  We know over time that this little cabinet will probably take a beating from the weather, so we didn't want to spend much money.  I have a pretty awesome, under shopped thrift store near my new house, so we set out to find a cabinet.  Lucky us, we found one.  I really like the size, basic lines and the hardware on this little gem.  For $14.95, how could we go wrong?!


The cabinet was in pretty rough condition, with a rut in the top from someone's drink and pitted hardware, I had to get my elbow grease and creativity out to get this job done.


I got to work using AS Chalk Paint in Old White on the cabinet and Rustoleum Metallic Silver spray paint on the hardware that we removed.  I sanded lightly, applying more pressure to the area that had the rut.  Three coats of paint did the trick.


Even my not-so-crafty hubby helped out with the hardware.


Don't get me wrong, he's a great guy and is super amazing at what he does for a living.  Let's just say, he isn't a carpenter.  Here's proof...


I asked him to drill two holes in the back so he could get the cords and wires into and out of the cabinet. Notice the "workmanship."  Oh well, the cabinet is for his stuff and this will work.  I said nothing to him about it.  I guess I kinda snagged myself here.  He reads my blog!!  Sorry Mister! (wink)

I finished the piece with a coating of BriWax in Clear to give it a little seal.

Done.  Ready to play some tunes...


Fun, quick, easy, cheap.  My kind of project!


Wednesday, July 18, 2012

How To Root Coleus. It's Easy. (and a Feature!)


Summer is here and many of us are using Coleus in our gardens and planted containers around our patios and porches.  I love Coleus because they are so hardy and thrive in the heat of the summer and the beating down of the sun's rays.  They are also filled with all sorts of varieties and colors too.  I think they add a little personality to any setting.  Better yet, they are pretty cheap.  Even better yet, they are the easiest plant to root.  I buy a few plants and multiply them through the season by taking cuttings as they grow or get a little 'leggy.'  Plus...as if I needed another great reason...they are a delight to have on my kitchen window sill as they root in cut little glass containers.

So here are the steps:

1.  Take a clipping from the top of your coleus.

2. Clear away the bottom of the stem of leafs.  I do this to cut down on rot in the water.  You only need the stem to get roots.  Extra leaves just get in the way.

3.  Find a cut clear container, vase or whatever.  I like clear so I can monitor the root growth as it comes through.  Fun to watch the miracle unfold.  Fill the container with fresh water that covers the bottom of the stem.


4.  Wait a few days to a week and the roots will start to show. 

5.  Wait until the plant has a healthy amount of roots and plant it in a pot with wet soil.  


6.  Make sure you give it a little water everyday for about a week to help it establish itself in the pot.  Done. New plant!  

This particular new coleus found a home on the table on my back screened in patio next to a few succulents. I also rooted that succulent there in the front middle.  How did I do that?  Well, it was a little baby or offshoot of a large succulent.  I just plucked it off and set it in this pot. Watered it daily and now look at it!


So simple.  I learned how to do this by trial and error.  I clip almost anything in my garden and try and root it this way.  Have you ever done this? You should!  Get clipping!

********Before I leave today,  I wanted to say THANK YOU to Kim over Savvy Southern Style for the nice feature of my White Living Room.  I have been posting links to my blog on her Wow Us Wednesday for over and year and this is my first feature!  Click HERE to see the feature.  Thanks Kim!


Click HERE to see the Original Blog Post about this Living Room

Thursday, July 12, 2012

My Chippy Vintage Mantel Makes The Move To a More Colorful Locale

A few months ago I did a radical makeover of a chippy vintage mantel.  I revealed the mantel in the post entitled, A Transformed Vintage Mantel Finds A Home in My Master Bedroom.  You can click on the title to see the full transformation.  Just after I completed this project, something happened...we decided to move.

It was a strange feeling seeing so many of my projects get left behind, like the neat Master Bathroom Renovation and the cool White Shutters that I made for that room.  But, for the most part, all my projects and furniture came along for the ride.  On move in day at the new house, each piece was placed in a new location, but the mantel just didn't have a place.  So it sat in a hallway between my garage door and our family room.  It was awkward there.  Even my sister expressed how much she hated it in the hallway.   When my sister says something like that, I know it is time to make a change!  She's the boss around here.

It took me a few days of carting the darn thing all over to figure out where to place it.  Then I tried something a little crazy.  I added to the master bedroom "foyer" area.  It fit perfectly and helped give this tiny pass through space a little presence.  I added a few things, like one of my red ladder back dining chairs with a pillow and a vintage #5 jug with a small live plant on the mantel.

It's funny how something that is designed for one location can work in a completely different place.  The previous room was pale yellows and whites.  Now the mantel is sitting within a very colorful locale. I am sure that I will be re-decorating this spot.  But for now, I'm okay with it.  I think it works wonderfully.  What do you think??


This tiny foyer to the bedroom is just off the White Living Room that I blogged about just a few days ago.  I love the transition of fresh whites to bright colors.


It almost beckons one to enter to see what is beyond the doorway.

Sunday, July 8, 2012

A White Living Room


I have always wanted a white room.  But let's be honest here.  How many of us can not take the risk of furnishing a room in all white and have the audacity to think that our kids will be as excited and keep it clean?  For years I have said to myself, "I will have an all white room when my kids are grown and gone."  Well, my kids aren't 'gone,' but they are teens and my new home has a formal living room just inside the front door away from the family room and media room.  So why wait?!

So here is my before pic.  The room had a seriously ugly faux finish and garish ceiling.  I mean, who paints a ceiling anything but white? Look at those grandma curtains. I knew they were going bye bye. My friend, Ted, helped me hang the art before we painted the room.  I knew the painter could just leave the hangers in place.  The only thing that was in the room was my pine farmhouse coffee table.  I was hell bent determined to make this room a white neutral room.  Putting furniture into the room would make it impossible to turn back.  Weird, I know.

In a recent copy of Southern Living Editor Lindsay Beirman wrote an article entitled, 10Tried-and-True Decorating Rules.  His number one rule was:

Lindsay Beirman. Editor/ photo Southern Living
1. When you just want a room to be "warm white,"meaning not too yellow or too peachy or too anything else, then go with Benjamin Moore Ivory White (925). Don't overthink this—I've already done enough agonizing for everyone and can say for sure that it works pretty much anywhere, unless you're going for museum-like sterility, in which case you're reading the wrong magazine.

So I took his advice and didn't even try the color in a swatch.  I told my painter to buy it and start painting.  Yes, I realize, this is a serious cliff dive for me.  For those of you who know me, I am the swatch queen.  I figured that if Lindsay was that sure, I would just go for it.  I am so super pleased with the results.

Having bought two Pottery Barn Basic Sofas with the White Twill Slipcover, I needed a white for the walls that had a little variation to offset the bright white (close to blinding white) of the slipcovers.  Benjamin Moore's 925 did the trick.

Ahh.  Love these windows without those heavy curtains. Clean.


I search high and low for two matching occasional chairs.  I searched at all my local consignment and thrift shops, but couldn't find two matching chairs that fit my needs.  I realized that I had to expand my search to local new furniture stores.  I wanted a neutral fabric, but a chair with character.  Nothing slip-covered.  I found these two chairs and fell in love.  They are from Lexington Furniture's Kingstown Collection for Tommy Bahama and are called Maarten Chairs. The chair comes in a variety of finishes. The finish on these particular chairs is a silvery taupe grey and the fabric is a wonderful nappy linen.  With nickel finished nail heads, what's not to love?!  The console tables under the paintings were in the same collection, which helped tie the taupe color into the room.

The pillows and throws (also shown in the first image in this blog post) are in a variety of neutral tones and textures. I bought them this week at Pier One and Home Goods.  I am still looking for a bench or a pair of ottomans for the open side of the seating arrangement.

I added an accent of taupe to the inside of the recessed ceiling. The taupe sets the ceiling off nicely drawing the eye in a subtle way.


I love how the white walls allow my colorful artwork to pop.  The center painting is a Haitian Painting by a well known painter, Louis Rosemont.  The two paintings flanking the Rosemont piece are two pieces that I painted a little over a year ago.


In the image below is a 6 foot by 6 foot painting that I found in a consignment shop.  I have no idea who the artist is, but I fell in love with it and scooped it up.  It stands alone nicely. (see below)

Here is a quick shot of the dining area that is adjacent to this living room. It's not really complete, but it's fine for now. I am continuing the white theme throughout the entire space.


Super excited about how this has developed.  Oh! and guess what?  My teens haven't even come close to my living room! They have not once sat on the white sofas! That's what happens when you don't put a television in a room!

Now, it's time to go get a little rest.  Coco is already ahead of me with that!

Wednesday, July 4, 2012

HAPPY DAY!

Sending wishes for a 

Happy
and 
Safe
4th of July Celebration!


Here's to hoping your burgers don't get burnt, 
that none of your fireworks are duds 
and that you will wake up tomorrow with a hangover!

-The End-

Tuesday, July 3, 2012

How To Give A Garden Element A Fresh Look: Froggy Gets a Much Needed Face Lift and the Water Garden Finds A New Place

If you have been following me for over a year, you know that I have a three tiered fountain that I converted into a planter with a water garden in the bottom tier.  I blogged about it in my post Are You Spittin'? in April of 2011.  I wanted a small water garden and no longer liked the splashing of all the water from the three tier at my front door!  Can you say "showering" my guests?!

So here it was at my former home at the front door.
Planter/Water garden at former home.


I moved this fountain on my own before the movers came because I have worked years on establishing the water plants in this mini-wonderland.  I wasn't about to let just anymore move it.  I even rented a truck to help me.

At first I put it near my front entrance, but moved it once again about a week ago to a location on the back of my property near where I walk my dogs.  I have placed a little table and chairs here as well.  Nice place for an afternoon beverage.

The little spitting frog that helps keep the water circulating in the water garden had gotten kinda, well, trashed.  So yesterday, I unplugged him and took him into my studio for a quick renovation.  Here is what he looked like.
Before Renovation

I decided to use craft paints to bring him back to life.  I also wanted to bring the bamboo back to life.  Without a little paint to protect it, I am sure it was well on it's way to rotting.  I just kinda went to town with several shades of green, brown and blonde.
Started with a base color and added color building textures. Added a little bamboo look as well.

Finished him off with a little gold to bring back the vertiginous look.


Here is the Before and After side by side for comparison.  Big difference and it took just a few minutes! I could have gotten all annoyed by the lack of detail on the lily pad.  But I just let it go knowing that it wouldn't really matter.  We have to remember to do that sometimes. Working something too hard at time just kills the fun.


I bought him a new pump to give him an even fresher look, and quickly placed him back in his world.  Here is is spitting away!!


Look at him down there spittin' away!  He got his ribbet back baby and is lovin' it. Don't be hating on my for that black cord showing.  I ran out of steam and have to go back and hide it under the white rocks. Saving that for a cool afternoon. The Heat! Phew! It's hot out there people!

Do you have something in your garden that the weather has taken it's toll on?  It is amazing what a little craft paint can do to spruce up even the most worn elements. I don't know about you, but I think garden accents cost a pretty penny!  Might as well get my money's worth for yet another season!

-The End-


Thursday, June 28, 2012

Red Ladder Back Chairs Take a Backseat From The Dining Room But Are Front And Center In Breakfast Nook


A few days ago I showed you the dining chairs that I found at a consignment shop and the subsequent reupholstering in white. In that post I mentioned that my red ladder back chairs, who had been married to my farmhouse dining table for over ten years, had to go since the dining and living room is being designed using all neutrals.

Today, I am showing you where they ended up...in my breakfast nook. I don't know if I should call it a nook, because this area has very large, wonderful french windows which open up to the outdoor living space. So it is not really very 'nooky,' but you get the point.  Perhaps, I need a new name for the area. If you got one, please share it!

I found this super gorgeous round glass top pedestal table at one of my favorite consignment stores. I loved it the moment I set my eyes on it, but felt like it had a lofty price attached to it.  But after doing a little research, I learned that was made by the fine furniture company Henredon and had gone for well over 5 times what it was currently priced.  I ask myself, "Who the heck spends all that money on such a table and then just decides to sell it for next to nothing?"  Well, their stupidity is my gain! (wink)

This nook (I swear I need a new name) is adjacent to my family room, which I showed you a peek in my blog post.  The slipcover fabrics and the rug have the same cranberry red color in them, so the chairs were perfect.  We eat at this table frequently and I love the glass top because it is easy to wipe up with a little spritz of Windex and a paper towel.


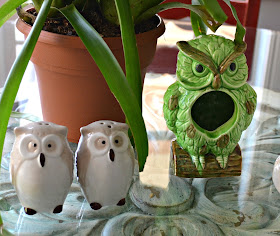
I change out the top of the table every few days.  My sister, Lisa, just found this totally cute little green owl at Salvation Army for me.  As many of you know, I give my owls a white paint face lift.  But, I think he will stay green for now.  We have had a debate going on about that hole in his chest.  Any guesses as to why that hole is there?  Come on...give me a guess.  Let's see if we can come up with it!


So I've have done a lot of things like this around my new house.  I am hoping to get around and get images so you can see some of my progress.  Hope it inspires you in some way.  Hey! one more image of that awesome table base!

To die for! Hope you have a great weekend!  I'm getting out and enjoying some of this sunshine.  That Tropical Storm we had lingering over us last weekend was a bummer.  Gonna go put my face in the sun.

-The End-