Upcycled Sweater Sleeve Wine Bottle Bags
Nothing goes to waste over here. Truthfully, I have a deep problem with it. Dinner leftovers are my lunch the next day. Old bread gets toasted with cheese on top. I keep toilet roll and paper towel leftovers for projects. I find rusty old stuff in the yard and before you know it, I am wearing in on my wrist as 'jewelry.' (I'm not kidding, I have done this.) So why stop?!! Why not....recycle old sweaters into cool stuff, like Wine Bottle Bags...
First, start with the sweater. Doesn't matter the condition of the sweater, as long as the sleeves are still nice. I like to use sweaters with a lot of cable knit in them because they add that cozy, textural feel. Look at these sleeves...
 The very end of the sleeve where your wrist would be will serve as the top of your bag, so pay close attention to it's condition. Notice the green sweater above has an amazing scalloped edge? Well, that is a nice detail to pay attention too.
 At this point, you just slide a wine bottle up into the sleeve and eyeball the length you will need. Lay the sleeve back down flat and cut it off straight.
In order to 'sew' up the bottom, I use a piece of yarn with a needle with a large eye. It doesn't matter the color of the yarn because it will not be seen in the end. For purposes of this demonstration, I used white because I knew it would be more visible in my images.
Turn your sleeve right side in! The outside of a knitted sleeve is prettier and there is usually an ugly seam on the inside.
Now you simple make a large running stitch through the cut end.
Pull the running stitch to cinch the end closed and tie off the ends of the yarn tightly.
Turn the sleeve back to right side out. Walla! A bottle bag!! Now you could simple put a pretty bow on your bag. After all, at this point, you have done your part for the environment and created something unique.
I added additional decor to mine. It's all preference. For one of the red sleeves, urr I mean bags, I created a poinsettia embellishment out of felt and buttons using a hot glue gun.
I cut a circle out of the felt that was about 3 inches and placed it down for the base of the poinsettia. I quickly snipped out three different sizes of rectangles for the petals. I then cut one end of the rectangles to form the petals and laid them down in a pattern starting with the larger and working smallest on top gluing them with a little hot glue as I went.
I finished off the center with a few black buttons. You could use anything. If you don't have spare buttons, get creative and use something you already have. You could even use the button off the sweater. I am saving that part of the sweater for another project, so I didn't want to use it now.
Now simple hot glue the poinsettia to the bag, tie of the neck of the bottle with a little string or ribbon and you are done!
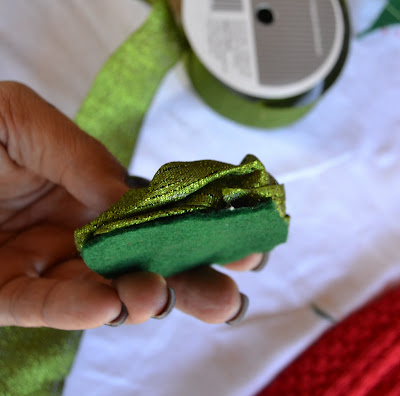
 For one of the red bags, I made rosettes out of felt and ribbon. There are a ton of tutorials out there on how to make these rosettes, so if you want... look around. I make mine using a large circle of felt that I cut like a corkscrew starting on the outside and working into the center. For the ribbon, I folded a wired ribbon in half lengthwise and starting in the middle wound it around itself. As I got to the outer 'petals' I twisted the ribbon a few times as I went to give it the look of opening petals. I then hot glued the ribbon flower to a piece of felt.
All of the rosettes above are glue onto a round piece of felt for stability.
I then hot glued the rosettes to the bottle and tied off the neck with a ribbon.
I had one more red bag and I felt like getting a little silly. Plus, I was looking for something a little quicker and easier. I simply took black felt and cut out a strip that would fit around the sleeve and hot glued it down. Using a piece of the green wired ribbon that I made the rosette with, I cut out a rectangle the size I wanted the bucket to be. I then snipped a little piece of black felt and glued it to the center of the ribbon to make it look like a buckle. I then tied off the top with a ribbon. Ho Ho Ho...
Aren't these just so much fun?!! Anyone can do this... You don't even have to have a red or green sweater. You could use just about any color if you jazz them up with holiday colors on the embellishments. You could even use blue and white, or all white for a switch up. Go for it! It's a great way to make something special for that bottle of wine and do something for the environment at the same time. Heck, how about save money?!! These bottles cost me $1 each to make! What are you waiting for?!!
Don't forget to come back tomorrow for my
Day 6
of
25 Days of Christmas and Holiday Ideas and Gifts Series!!


15 comments:
these are so cute! i love the poinsettia. i would love to find some nice warm white wool sweaters to make some!
The Santa belt embellishment is very cute and clever!
Cute!! I love the idea of upcycling sweaters this way. I'm a total hoarder when it comes to things around the house I think I can "upcycle" rather than throw. lol!
OK you are killing me with all this creativeness!!!lol Love them! I put your button on yesterday but your homeless finch button did not work
These are the cutest things. Thanks for the tutorial. Love them and I know friends will too.
Perfect! I just bought some GW sweaters to make pillows and now I know what to do with all those sleeves!
Deb
Very cozy and cute for gift giving! I love that they are an upcycle, too!!!
This is the most perfect hostess gift. Thanks for sharing.
This is super sweet. What an original way to give wine! I'm going to guess that you will have some other project with the rest of the sweater! ehehe.
The colors and textures are so perfect for Christmas. Your poinsettias and other embellishments look fantastic. You're so creative.
Great idea and tutorial.....I'd love it if you'd link up at my Wednesday Wrap Party going on now. Remember to link back, feel free to grab a button. Warm Hugs,
That's so clever and looks fabulous.
I'd love it if you could link this project to my Simply Christmas Inspiration party at http://shabbyartboutique.blogspot.com/2011/12/inspiration-friday_09.html
Ohmyword!!!! I would be one of the happiest people to get one of those as a gift! They are soooooooo pretty!!! I'd love for you to share this with my readers for our Fun Stuff Fridays linky party. http://www.toysinthedryer.com/2011/12/fun-stuff-fridays-3.html
I love those wine bottle bags.
lisa
These wine bags are adorable (and thrifty too!) I'm featuring them on my frugal sewing site Sewistry next week. Here's the link: sewistry.com/2013/11/wine-gift-bags-upcycled-sweaters/
Post a Comment